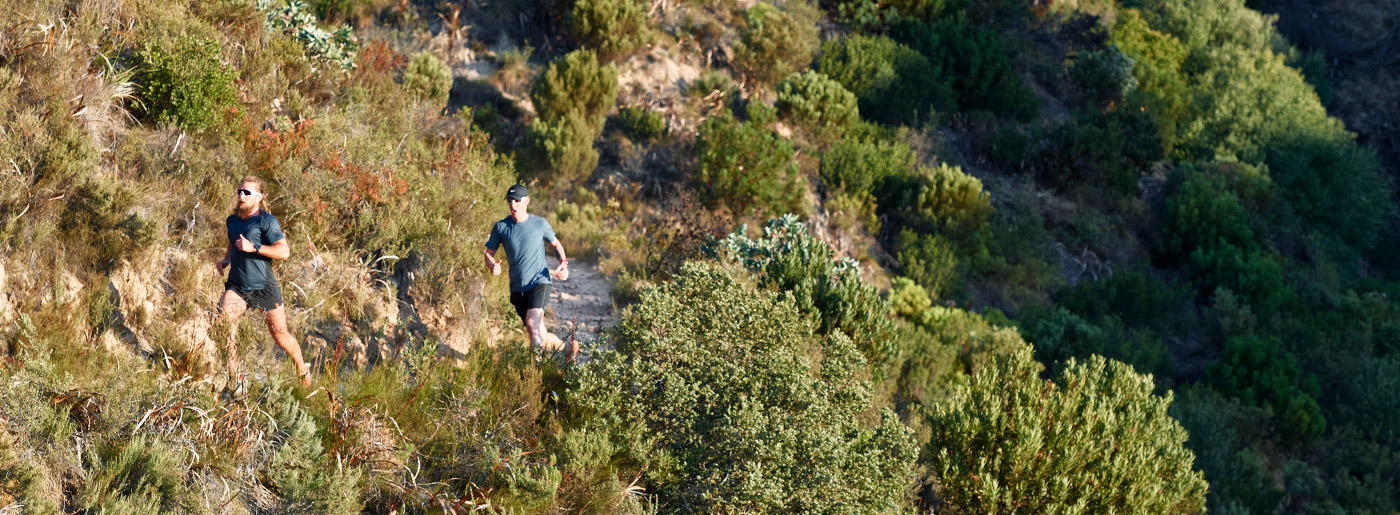
Conquering uphills is just a hop, skip, and a jump away – literally.
Running outdoors is all fun and games: you’re enjoying the fresh air, the changing scenery, and just the general feeling of freedom. You feel lifted and empowered – until you hit an uphill and that’s all gone. Sound familiar?
I eat hills for breakfast.
Runners love to hate hill running – so much so that there are a plethora of sayings dedicated just for the cause. Running shirts that read “I eat hills for breakfast” and “The hills won’t know what hit them” do their part for building motivation and lifting spirits, but fall short when it comes to actually enhance your performance.
The uphill itself is the best teacher but hitting the hills isn’t the only recipe for improving your hill running.
So, other than wearing a cool shirt, what can you do to tame those hardcore hills?
Tips for conquering hill running
Why is hill running so darn hard? In short: because you are not only working against gravity in moving yourself, but you have the added disadvantage of pulling yourself up. This means that every pound you carry on you equals more baggage you have to drag with you.
Here’s some advice that can help you make it all the way to the top:
Use your arms
Actively use your arms to help lift the knees, and to stay light on your feet. If you swing your arms rhythmically, you’ll often find that your legs will try to match their pace. Use this for your advantage and concentrate on the arm motion!
Pay attention to landing
Don’t let landing stop the motion, but instead keep moving forward and up with every step you take. Soft landing (as opposed to heavy thumping and “falling” on your foot) means less work to keep the momentum going.
Let the hill teach you
For the runners ready to bite the bullet and eager to become faster climbers, the uphill itself is the best teacher. Running hills should be a part of every serious runners’ weekly routine. Facing the test repeatedly not only works to strengthen physically, but it also teaches something valuable about uphill philosophy. Making yourself face the hill, again and again, helps you push past the uncomfortable and trains your mind to accept the passing discomfort and to, for a moment, allow the uncomfortable to be the new normal.
The greatest physical challenge posed by uphills is a greater than usual cardiovascular demand – read: you will get very breathless. Uphills also crave more from your muscles, especially your glutes, calves, and quads. Luckily, the only recipe for improving yourself in these two areas isn’t just hitting the hills.
How to pick up your uphill pace with plyometric exercises
A great complementary strategy for picking up your hill running pace is to incorporate plyometrics into your training routine. Plyometric training equals performing a series of quick, powerful movements that start with an eccentric phase (lengthens the muscle) and are followed by a concentric phase (shortens the muscle).
Plyos can benefit just about anybody looking to become faster, stronger, and more agile in their sport.
Plyometric exercises – or plyos – are typically performed with power and at a high speed, which makes the muscles’ extension-contraction sequence rapid and explosive.
Contrary to popular belief, plyos are not only helpful to a selected few sprinters and jumpers but can actually benefit just about anybody looking to become faster, stronger, and more agile in their sport. Most plyo exercises are also great for keeping the heart rate high, torching calories, and helping with weight loss.
Make an all-out effort
Plyo might not be the best bet for someone just getting started with working out, or the first thing to try after recovering from an injury. Plyos require a total or near all-out effort and are, therefore, not the exercises you want to finish your challenging workout with.
Instead, do them at the front end of your training session – or even as a workout of their own. Full recovery from a strenuous plyo workout may take up anywhere from 48 to 72 hours, so it isn’t the kind of training you want to do all too frequently.
Pay attention to rest periods
Plyo is not a warm-up, but it works well for hill-running newbies as the first part of another workout. A good plyo beginner sequence consists of 3 moves, 2-3 sets of each, and 5-10 repetitions. The more advanced plyo trainers can earmark a whole training session for the cause, double the number of moves, and (based on the body’s feedback) aim for 10-15 repetitions.
When going over your plyo routine, consider the impact of rest periods: how much time do you give yourself between sets? A heart rate monitor is an excellent aide for telling you exactly when your cardiovascular system is ready for the push: shoot for an HR at or below 60% of your maximum heart rate before the next plyo move.
Keep it safe
Another thing to watch for is the intensity level: how much of your maximum potential are you using (for example, how high do you jump vs. how high could you jump)? Aim for quality over quantity and keep it safe. If you use equipment like steps or boxes for the moves, remember that you may have to lower the platform as you start to fatigue.
GAIN MORE POWER to run uphill with these plyometric exercises
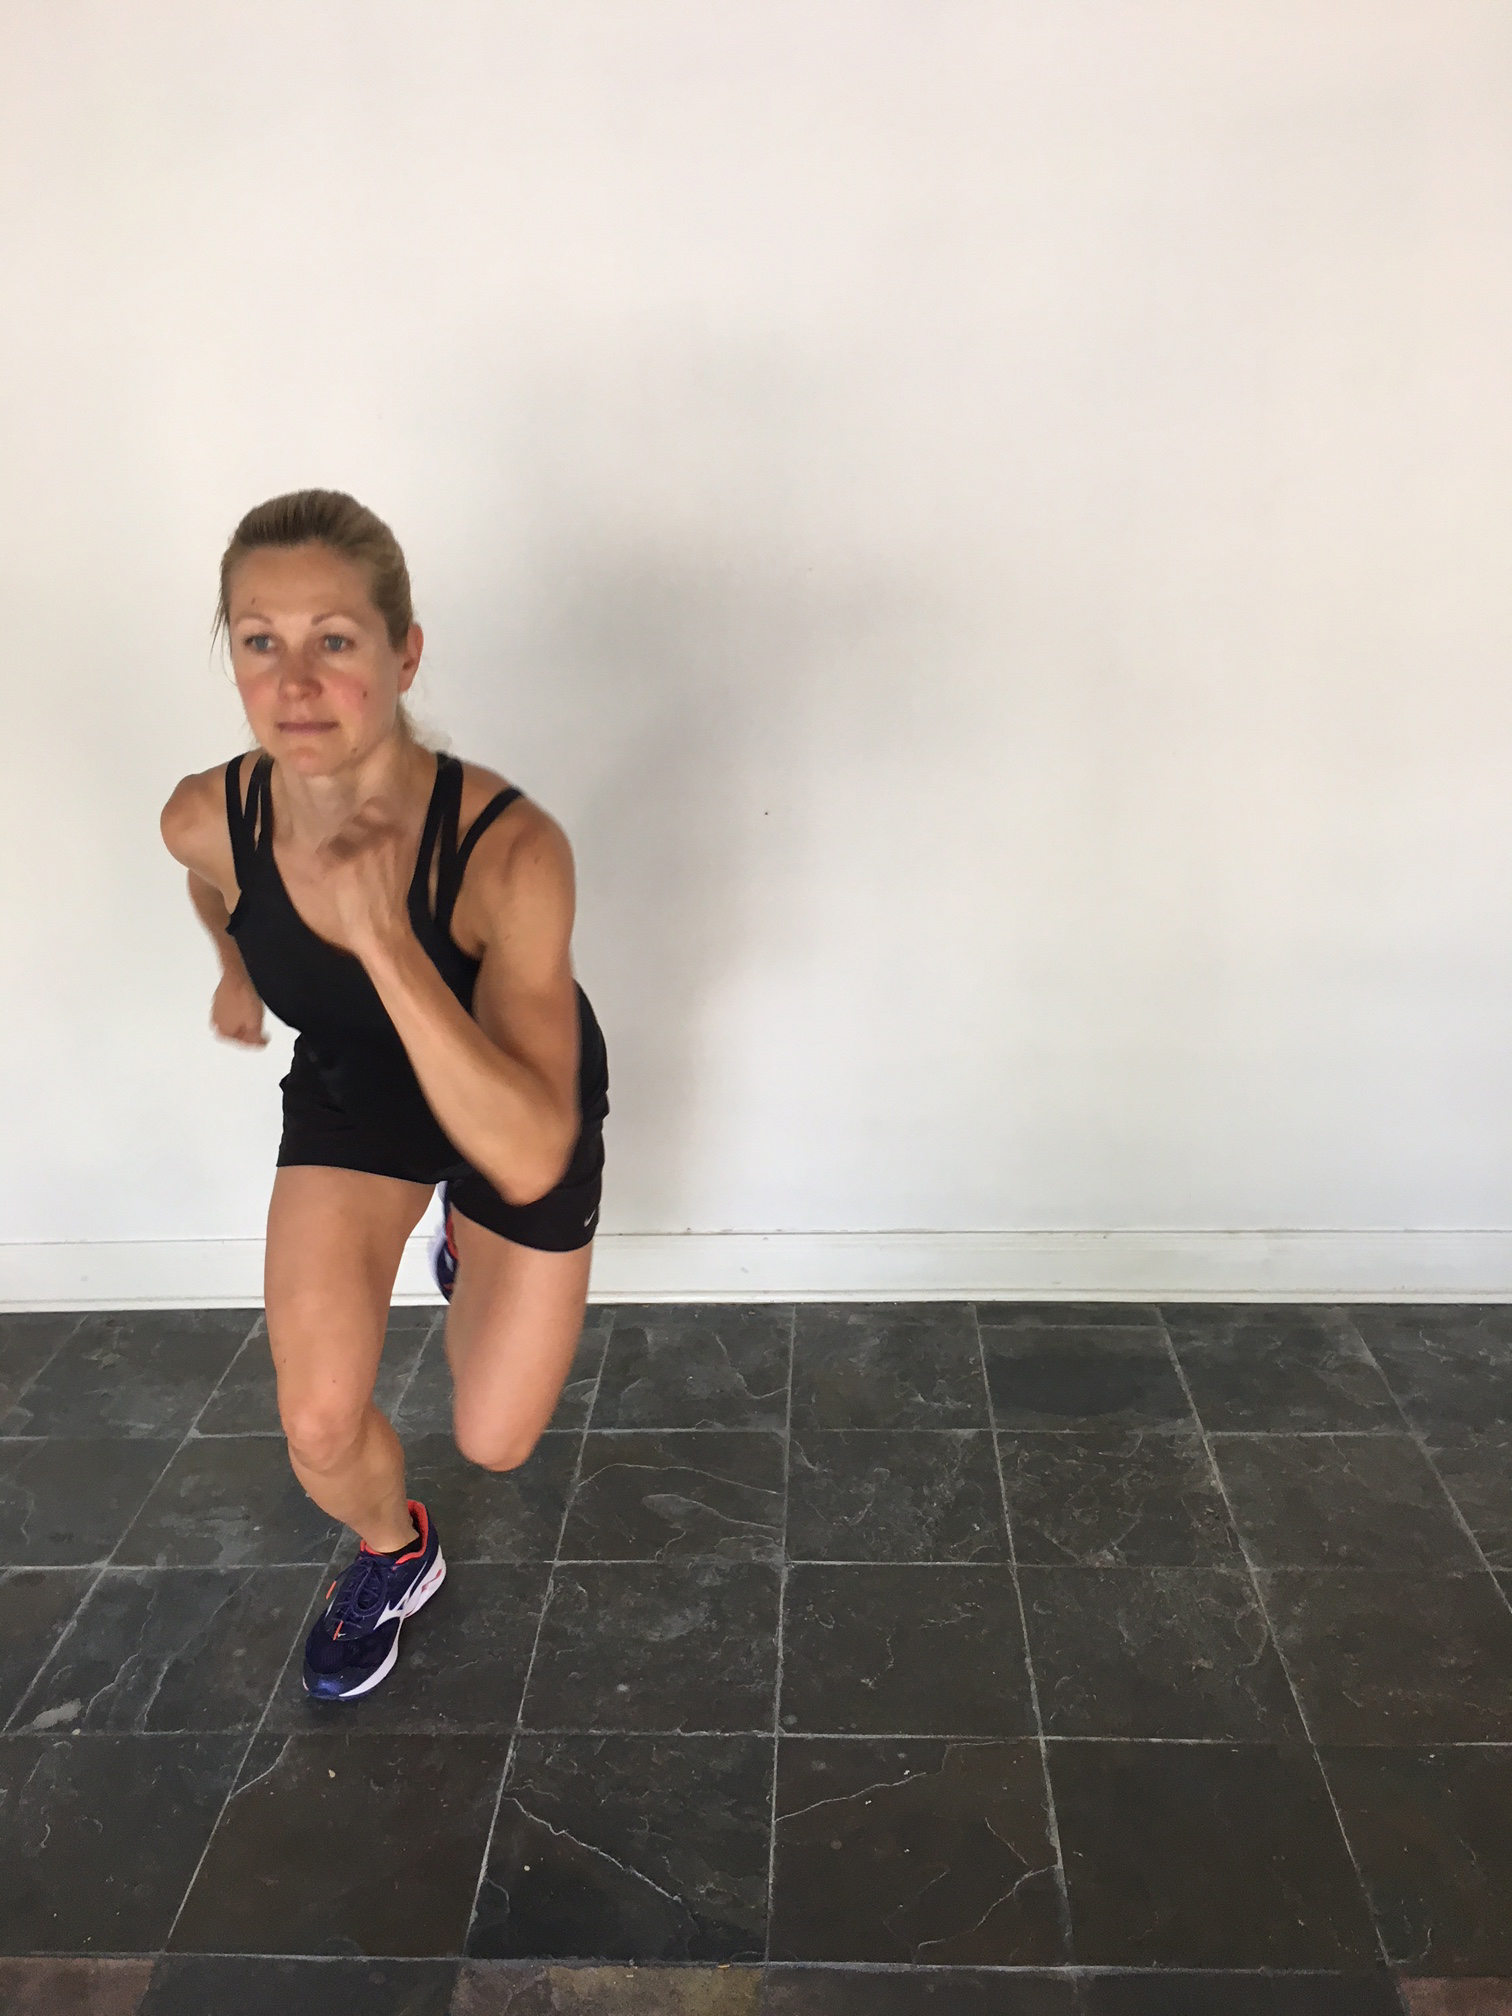
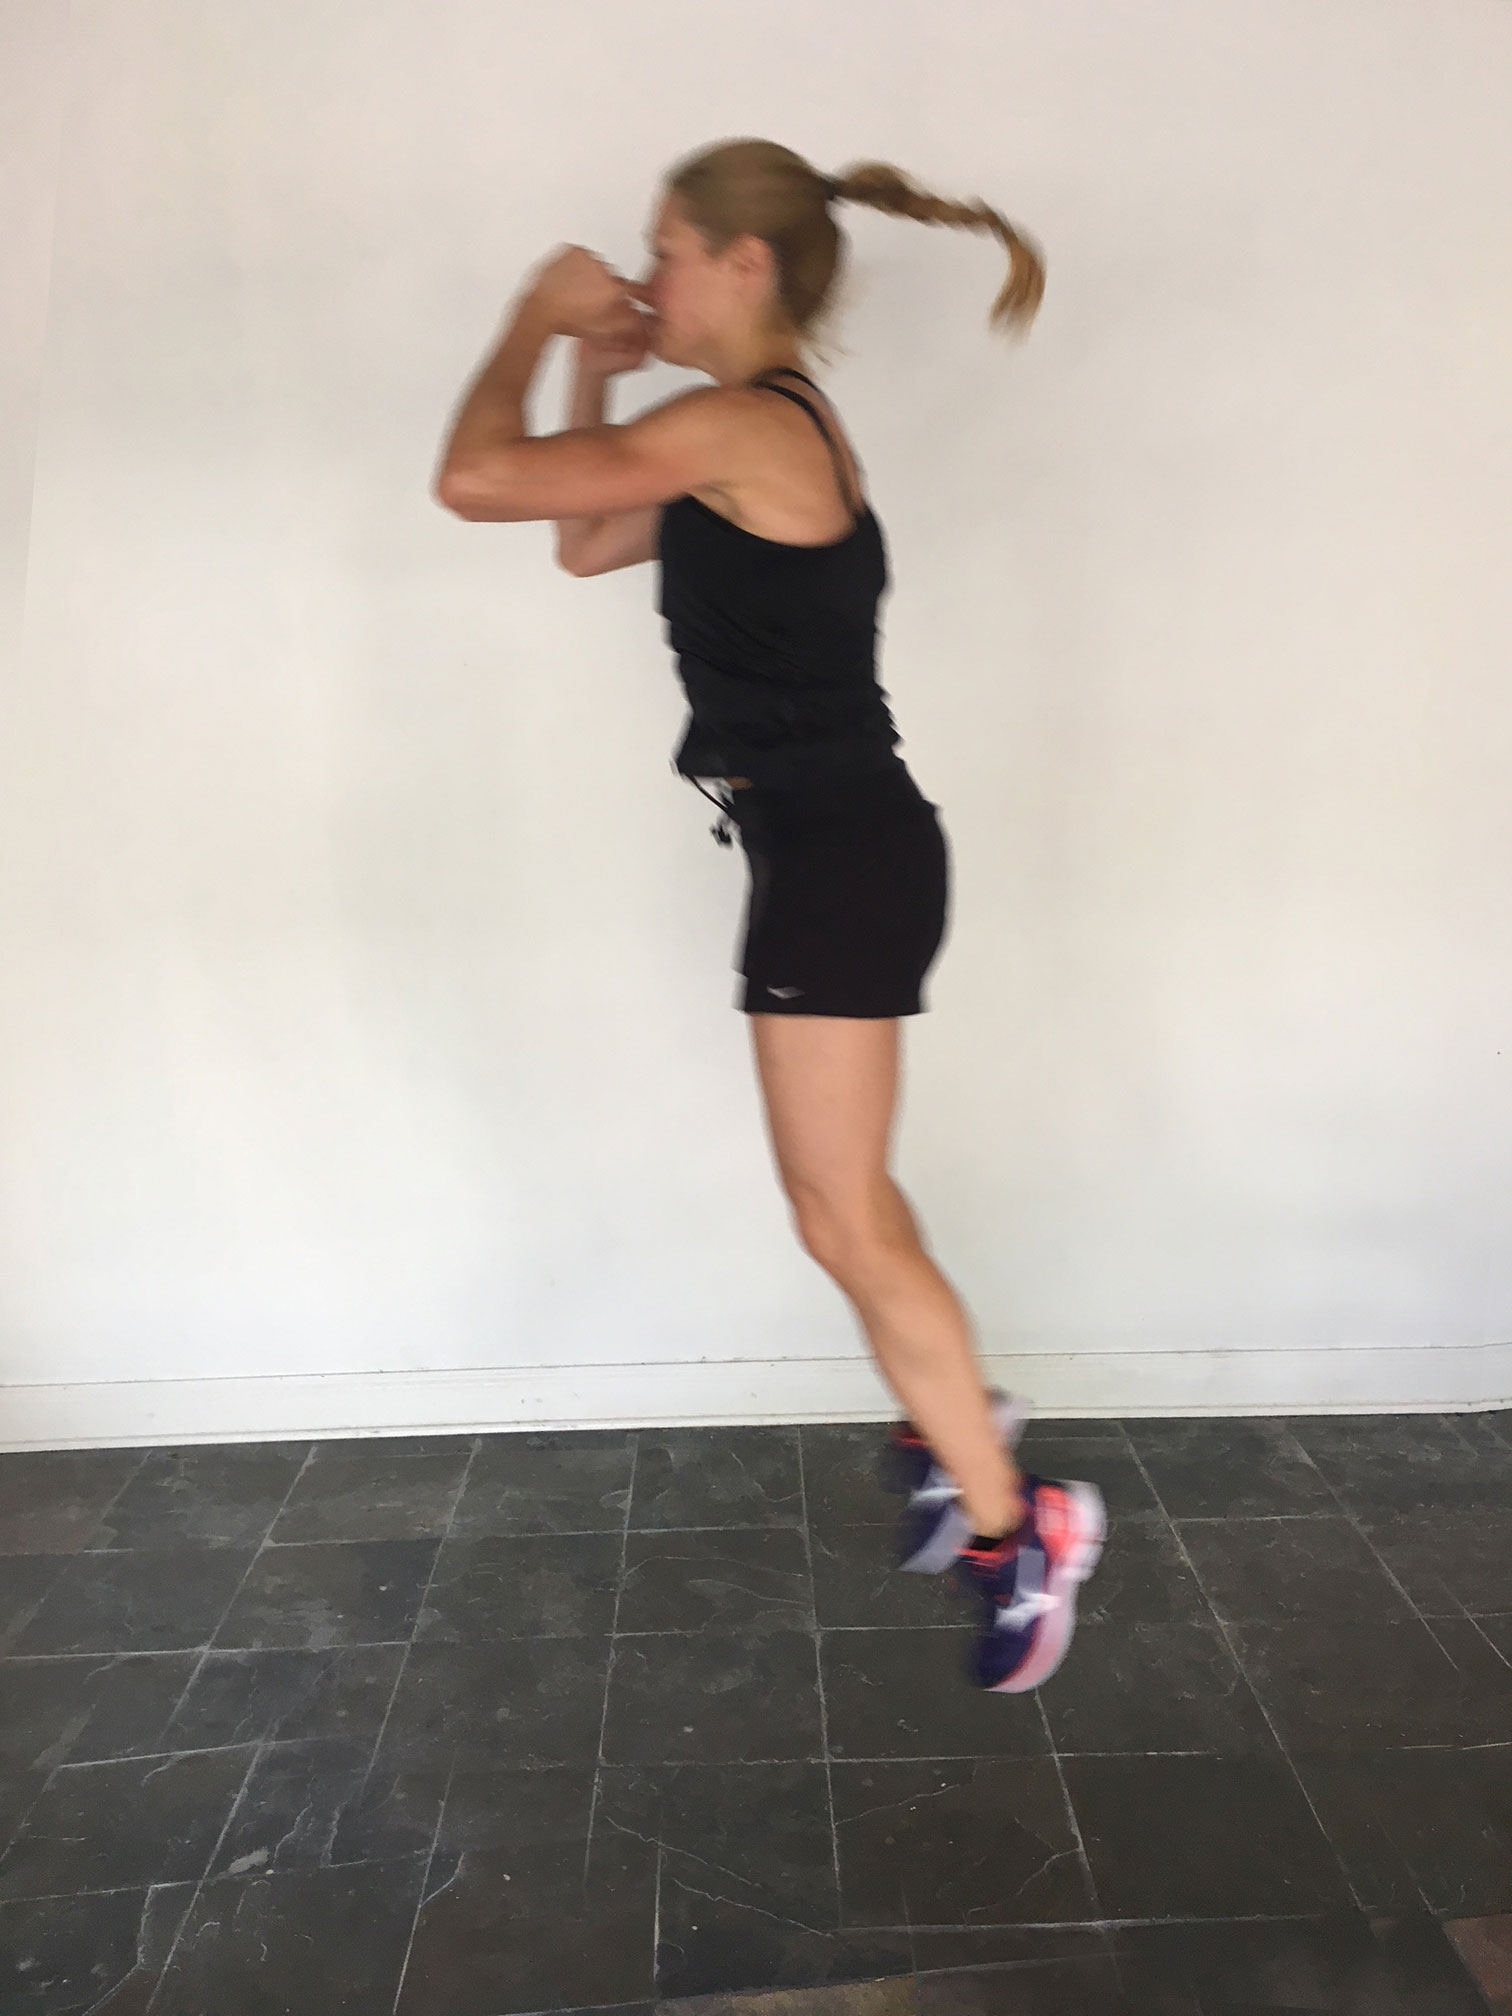
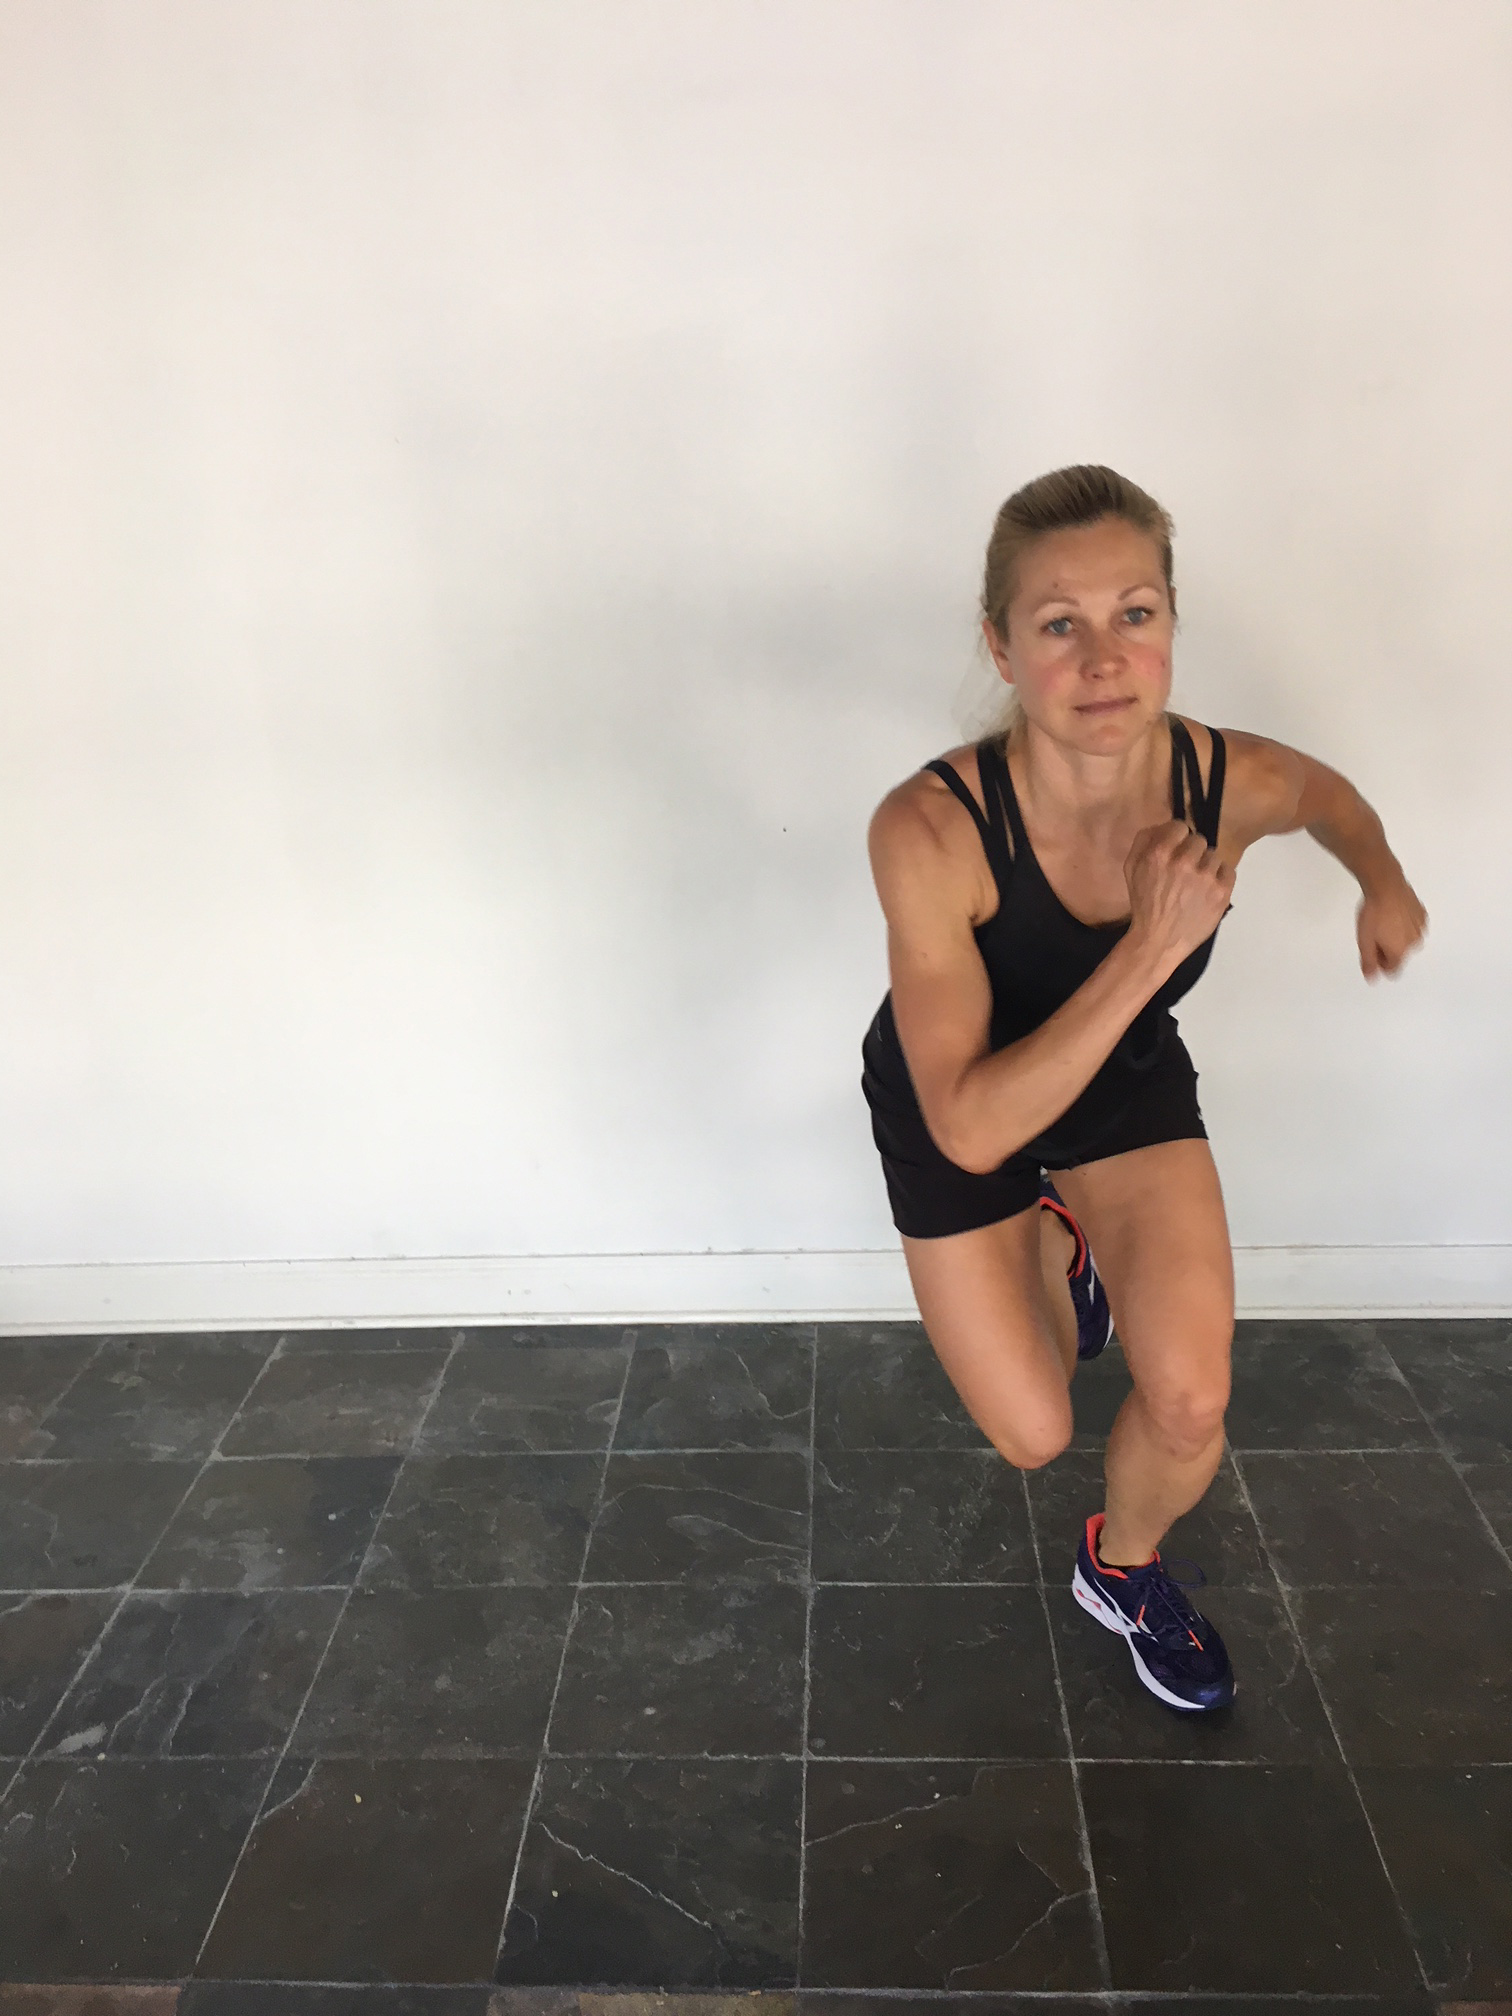
1. JUMP LUNGE
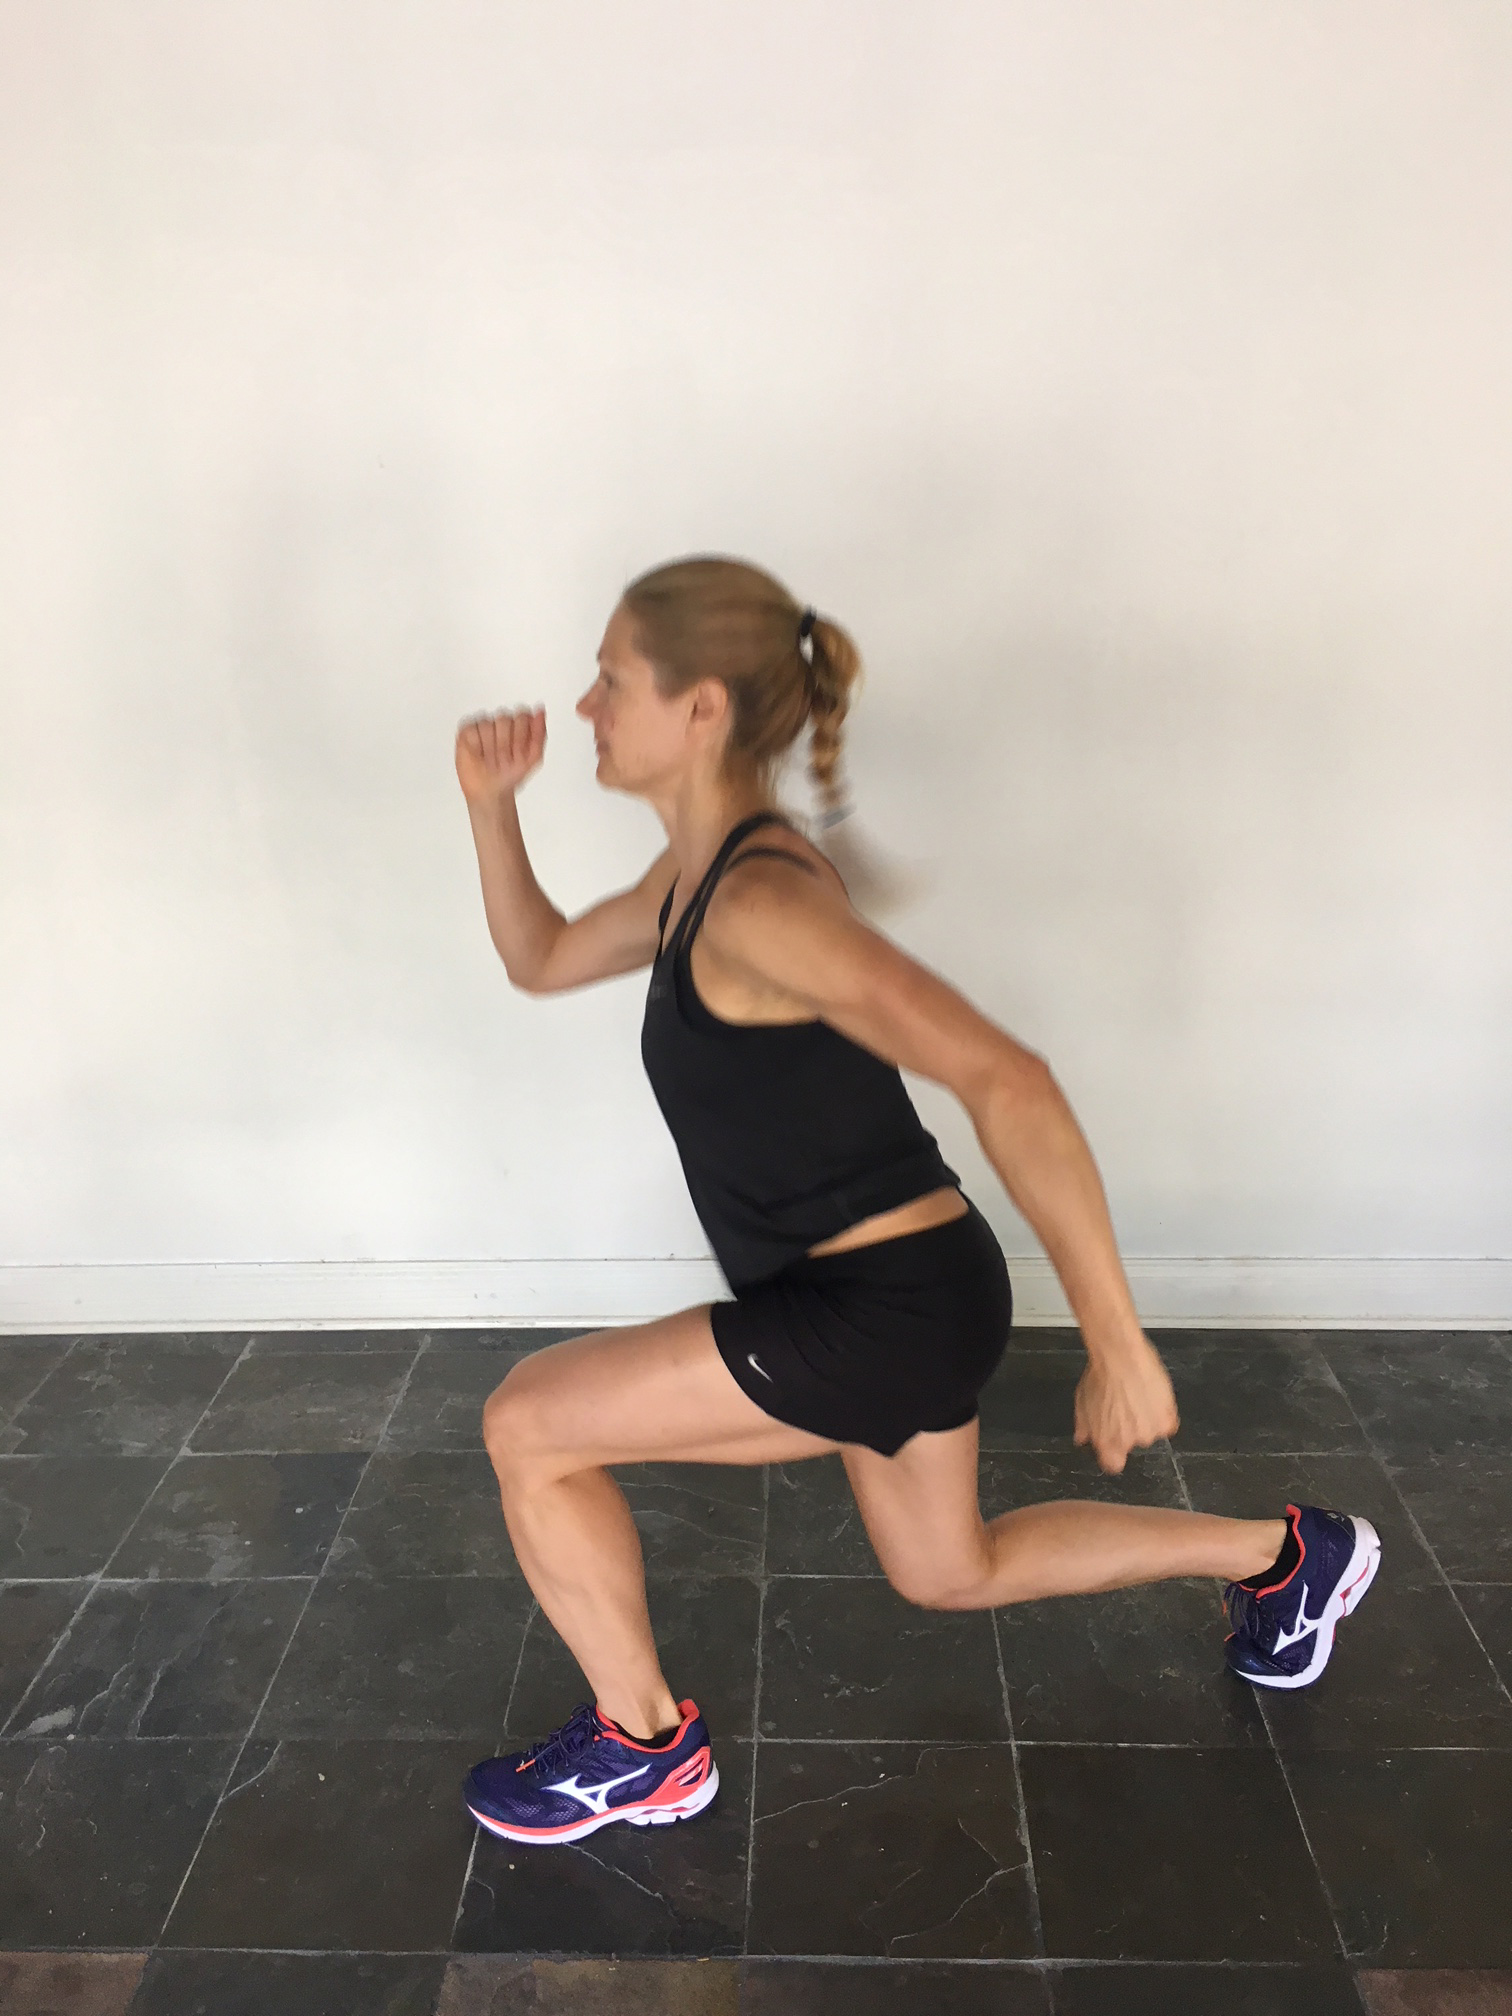
GET SET: Take a long step forward and drop your back knee down into a lunge position. Both knees should be roughly at a 90 degree angle.
GO! Jump up, pushing with both legs, and switch leading leg mid-air. Land in the set-up lunge position, but with the opposite leg in front. Lower until knees are at 90 degrees and repeat.
CHECK: Your front knee and toes point forward, your back is upright, and your shoulders pulled back.
2. JUMP SQUAT
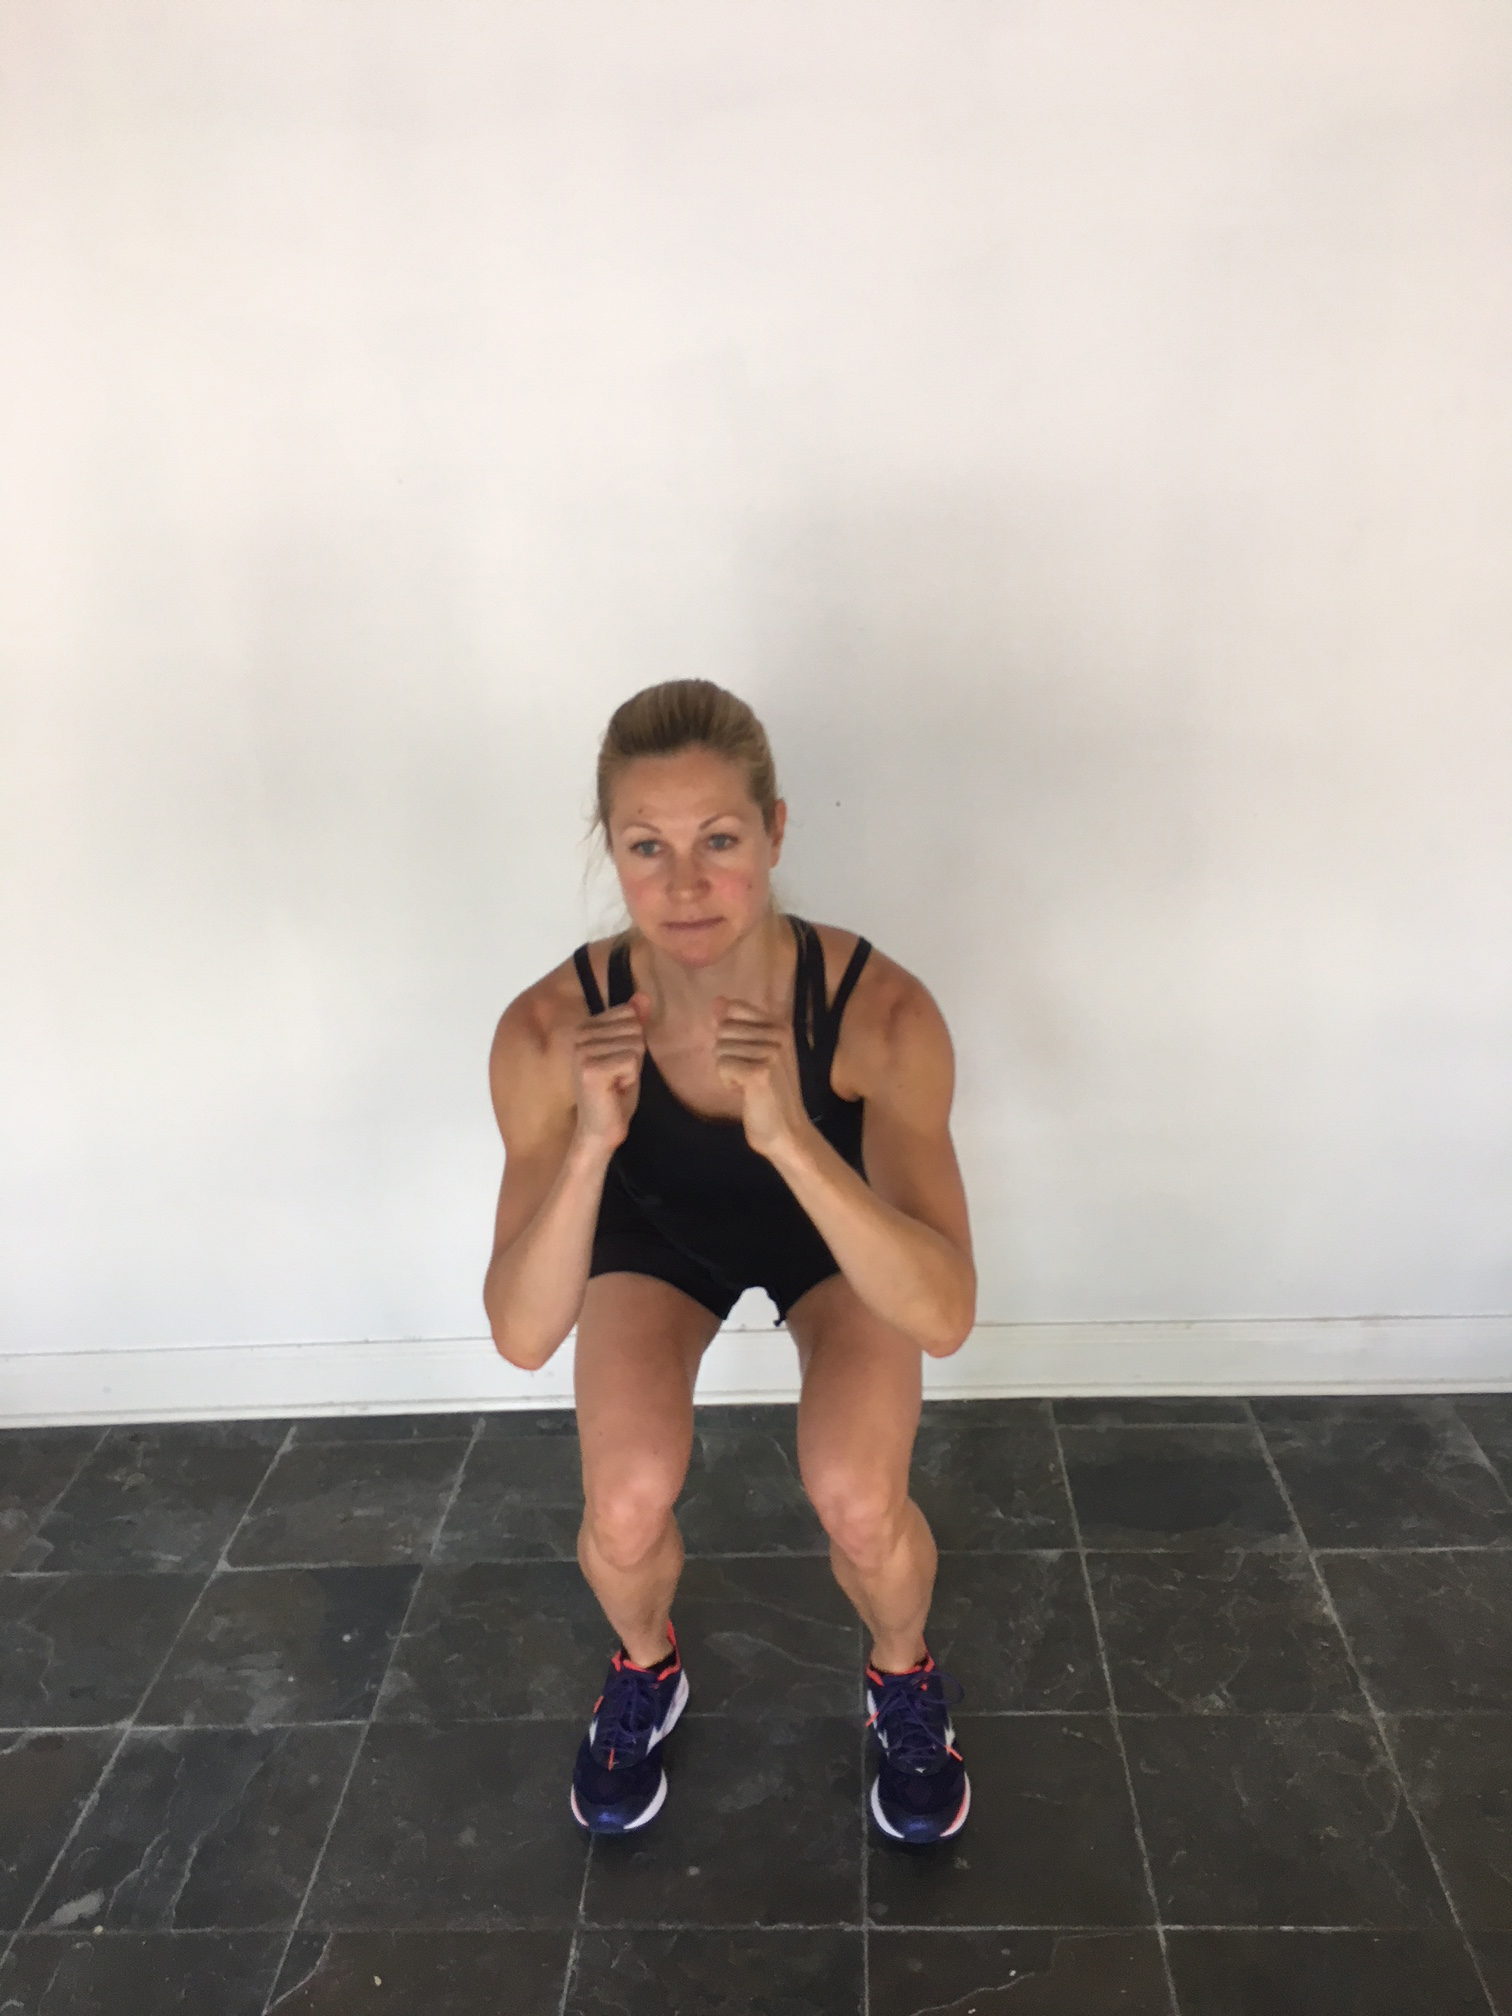

GET SET: Start with your feet shoulder-width apart. Lower down into a squatting position with your hips at knee-height or slightly higher.
GO! Push off the ground and into the air, aiming for maximum height. At the peak of the jump, your body is straight from head to toe. Land in a squat position and pause for a moment, then repeat.
CHECK: Your weight is mostly on your heels, your core is engaged (pull your navel towards your spine), and your chest is lifted.
3. SKATER JUMP

GET SET: Stand on one leg with your hips and leading leg knee bent, trailing leg hovering in the air behind you, and find your balance.
GO! Jump straight to the side, going for both length and height. Land on the ball of the trailing leg foot, bending your knee and lowering to set-up position. Allow arms to assist the motion.
CHECK: Keep your back straight, leading leg knee and toes aligned and pointing forward, and your arms ready to move.
4. LONG JUMP

GET SET: Stand in a squat stance with feet shoulder-width apart. Bend your knees and lower your hips to knee-height or slightly higher.
GO! Push off the floor and jump as far forward as you can. Swing your arms to add length to the jump. Try to land with your feet slightly in front of you.
CHECK: Your toes are light, your heels are heavy, and your knees and toes are aligned and pointing forward.
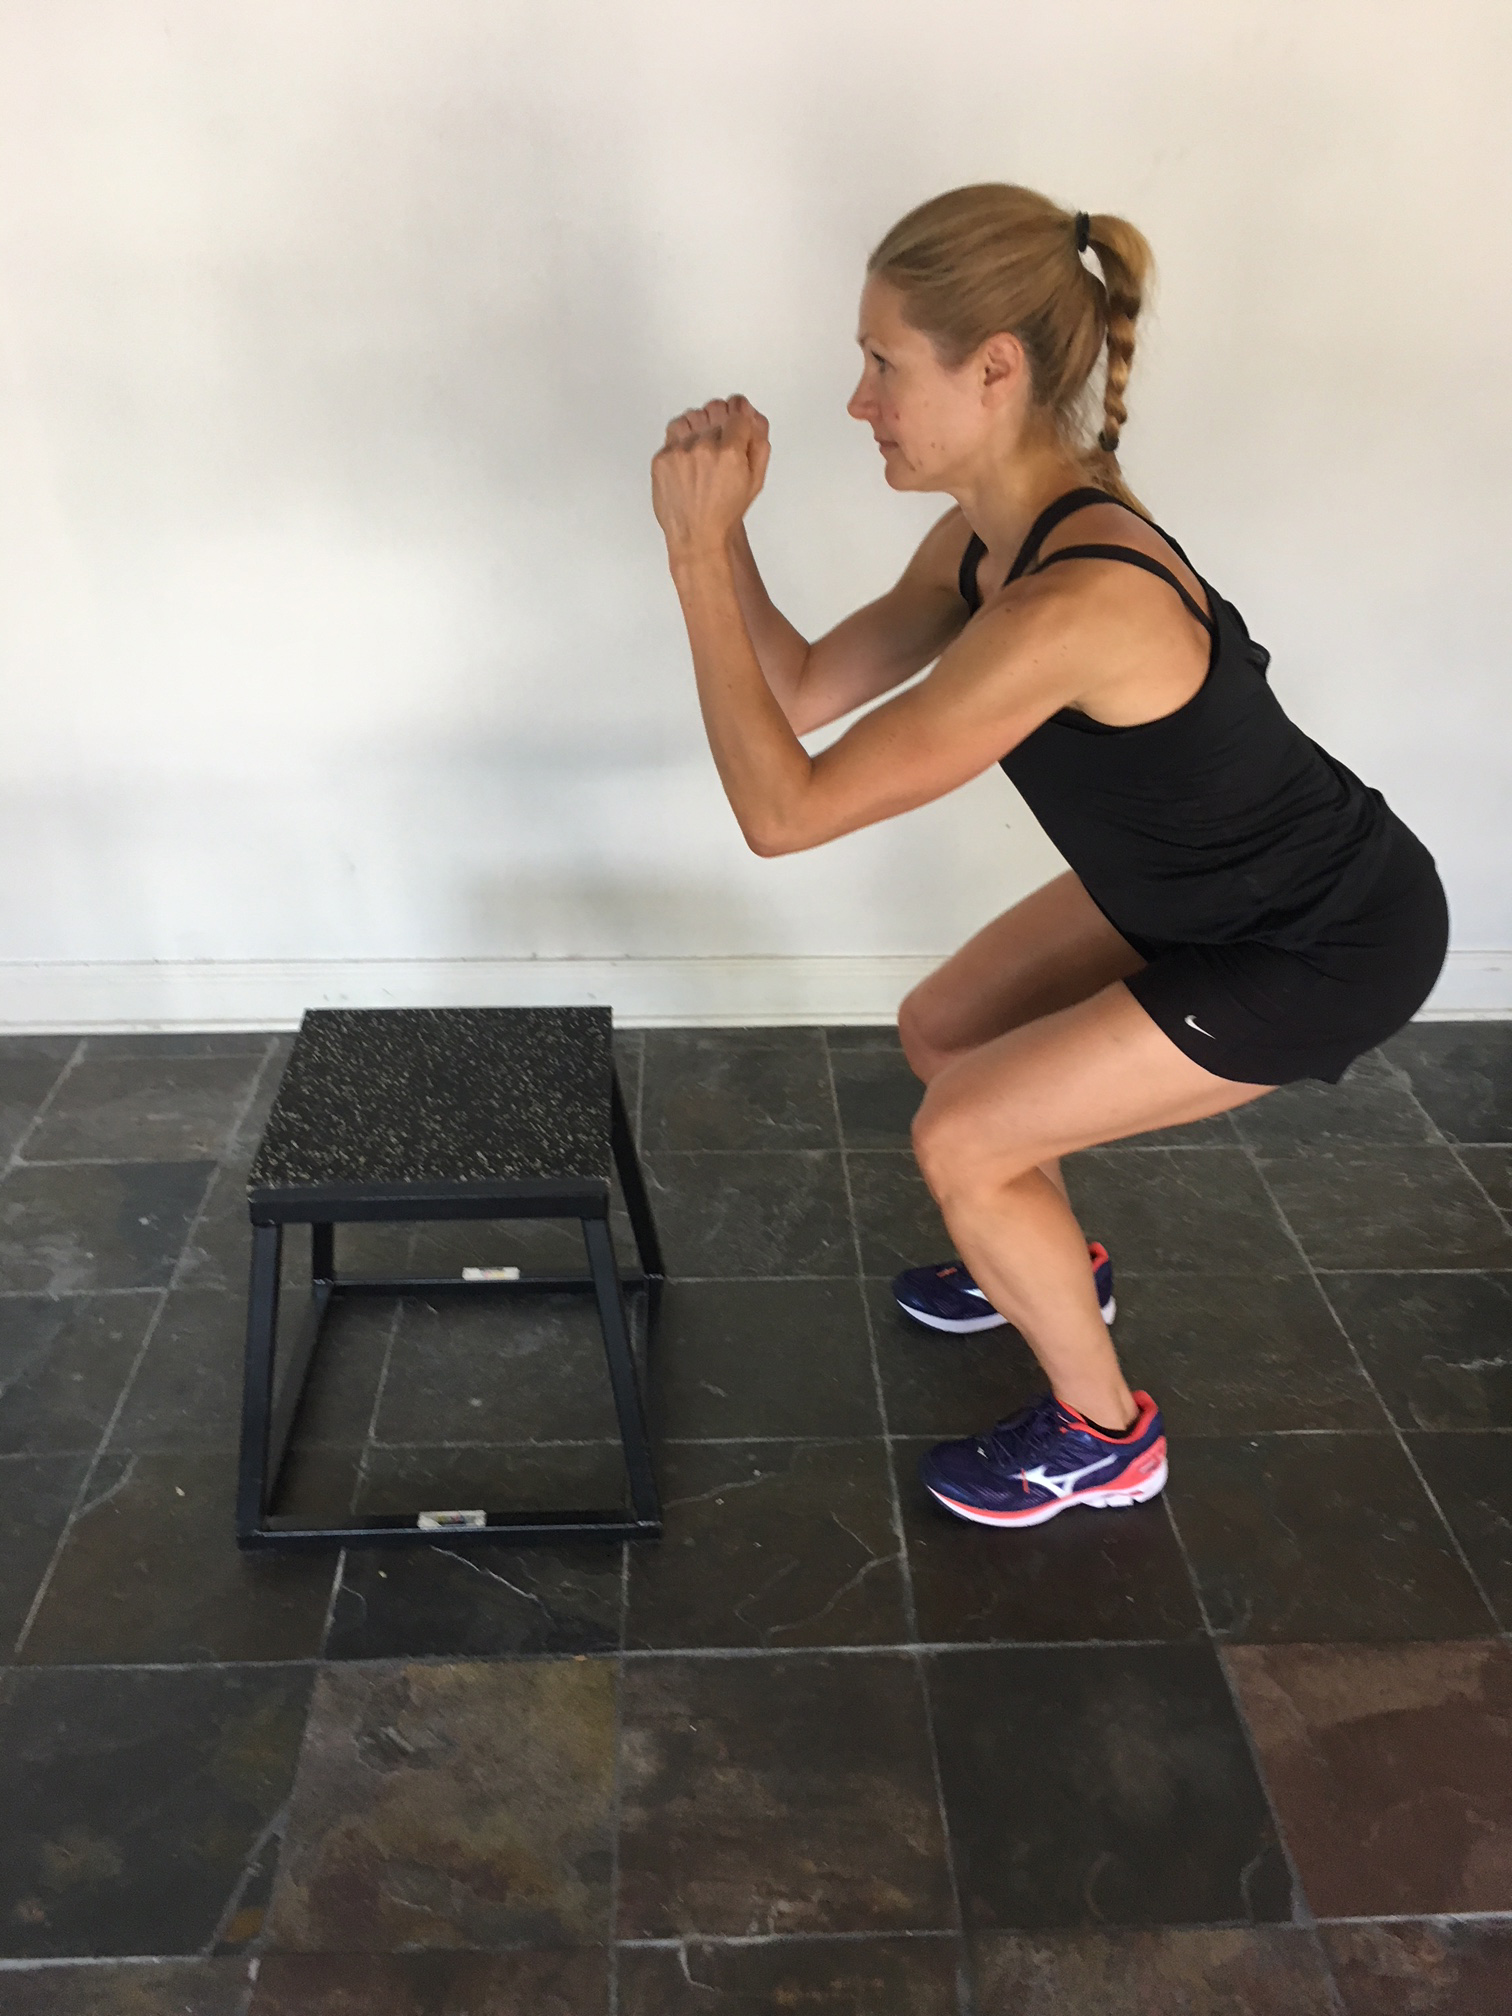
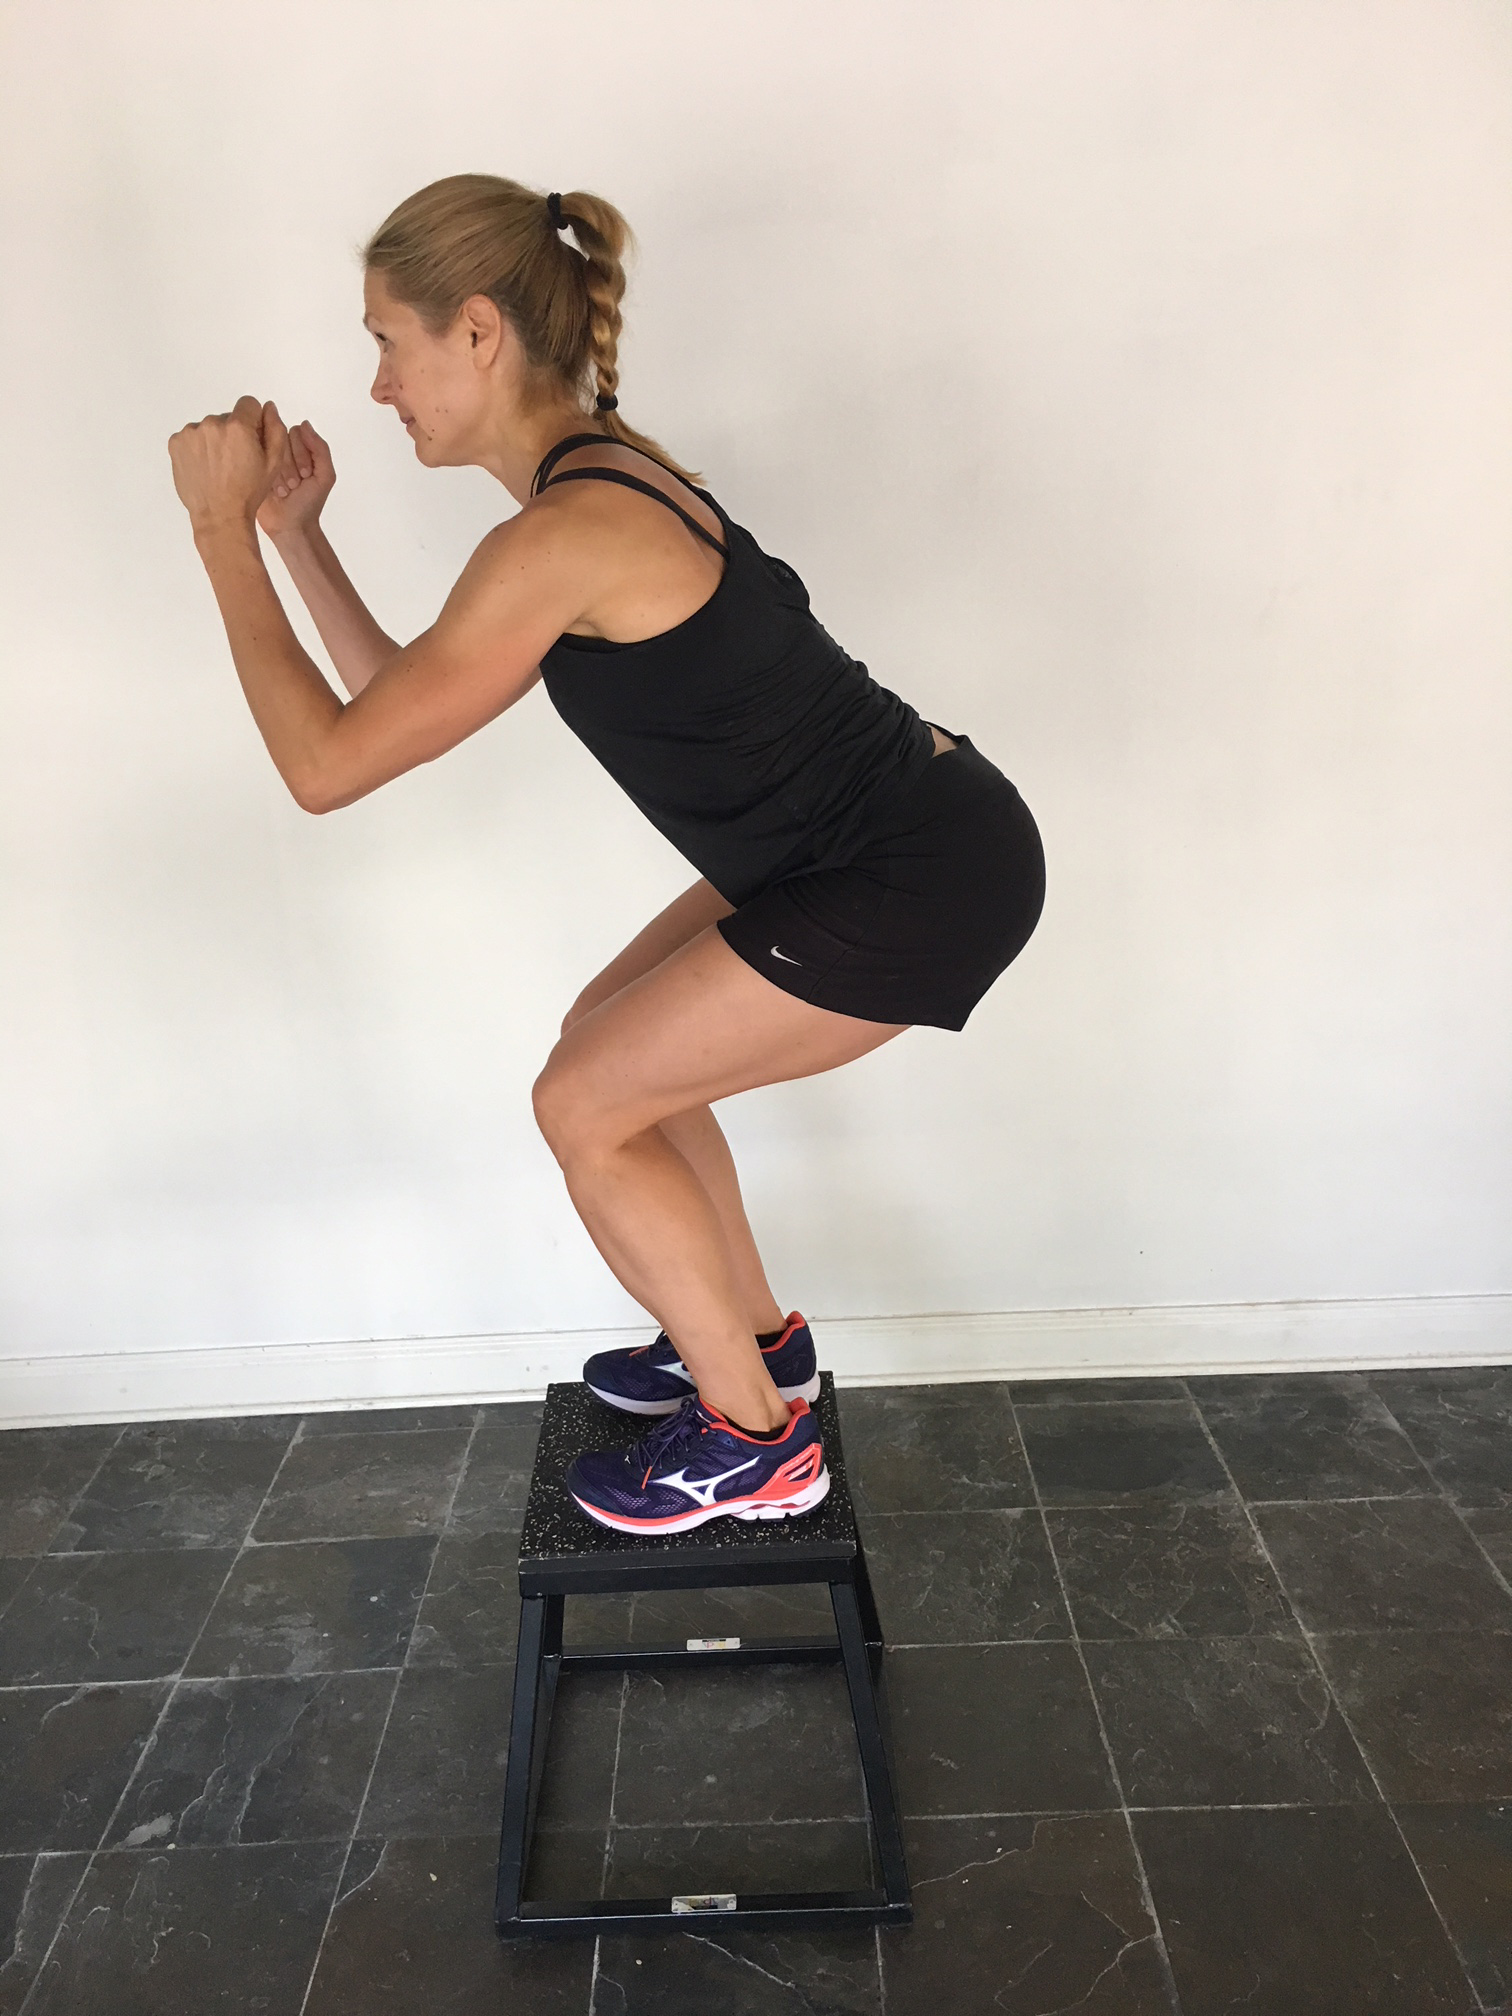
5. STEP-UP KNEE DRIVE JUMP
GET SET: Stand tall, closely behind a box or a step of a suitable height.
GO! Step on the box, driving your other knee up to navel-height and pushing off the box. Land on the box with the same leg and step down. Repeat with other leg.
CHECK: Land on the box with your whole foot so that the heel is not left dangling outside, and make sure you lift your hips when you lift your knee.
6. BOX JUMP
GET SET: Stand with your feet shoulder-width apart behind the box, drop into partial squat depth, and push your feet firmly to the floor.
GO! Extend your hips, swing your arms, and jump onto the box lifting your knees up. Land softly and quietly, absorbing the shock by bending your knees to squat position, and hold for a moment.
CHECK: Find a box that is the right height and a comfortable distance from the box, and utilize your arms to help you jump higher.
If you liked this post, don’t forget to share so that others can find it, too.
Please note that the information provided in the Polar Blog articles cannot replace individual advice from health professionals. Please consult your physician before starting a new fitness program.

